How to Test Smoke Detector Battery: Step-by-Step Guide
That middle-of-the-night chirp from a smoke detector is nobody’s favorite wake-up call. More often than not, the fix is simpler than buying a whole new unit. Testing your smoke detector’s battery regularly takes less than a minute and can prevent false alarms, confirm your device still responds to smoke, and give you peace of mind before you hit the pillow.
Test button hold time: 30 seconds · Battery type: 9V · Recommended test frequency: Monthly · Power indicator: Green light · Top false alarm triggers: Dust, steam, ammonia
Quick snapshot
- Hold test button 30 seconds (Prepared Hero)
- Test monthly per NFPA guidance (Prepared Hero)
- Green light means normal operation (Allstate)
- Exact 9V battery lifespan varies by model and usage
- Green light behavior differs across manufacturers
- Regional variations in recommended battery types not fully documented
- Replace 9V batteries every 6 months (Allstate)
- Smoke detector units last up to 10 years (Smoke Alarm Test)
- Sealed lithium batteries last 10 years (Prepared Hero)
- If test fails, replace battery immediately
- If chirping persists after replacement, reset by holding test 30 seconds
- Consider upgrading to sealed lithium models
Five key data points tie the testing picture together, drawn from fire safety authorities and insurance safety guides.
| Label | Value |
|---|---|
| Standard test method | Test button press |
| Hold duration | 30 seconds |
| Common battery | 9V |
| Power indicator color | Green |
| False alarm causes | Ammonia, dust |
How to know if a smoke detector battery is working?
The test button is your first checkpoint. Press and hold it for about 30 seconds—a loud, clear beep means the battery is still good. A weak sound or silence tells you to swap the battery right away. Per Prepared Hero (fire safety guide), this method simulates a real alarm and verifies that both the battery and the siren are functioning.
Locate the test button
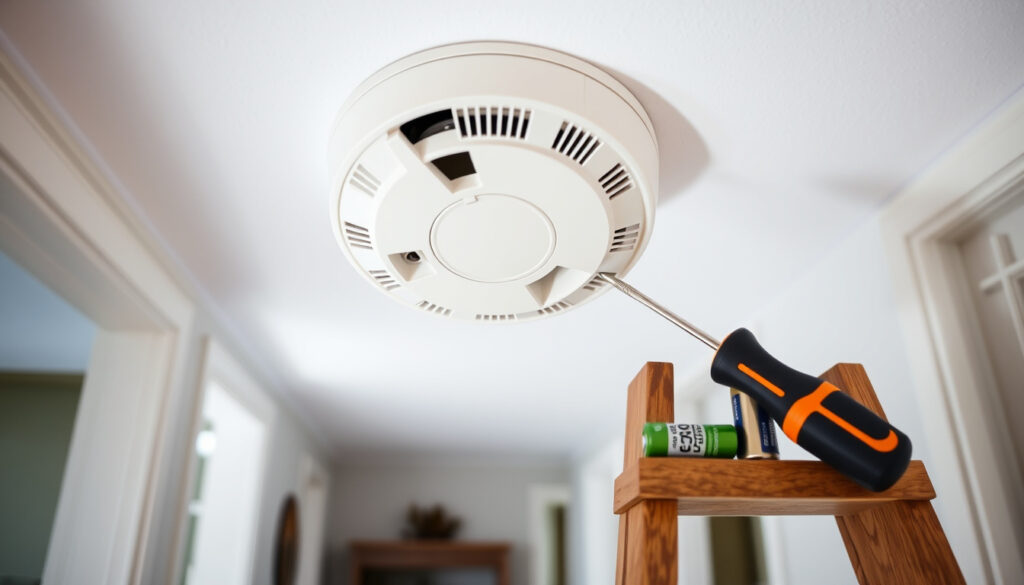
Most smoke detectors have the test button centered on the face of the unit. On battery-powered models, it’s usually on the front cover. On hardwired models with backup batteries, the button may be on the front or side. If your detector is mounted on a high ceiling, use a broom handle or a sturdy stool to reach it safely.
Press and hold for 30 seconds
According to fire safety guidance from Allstate (home insurance resource), you should press and hold the test button until a loud siren sounds. The 30-second hold is essential—shorter presses may not trigger the alarm even on a functioning unit.
Listen for alarm sound
A good battery produces a sharp, loud alarm. If the sound is muffled, intermittent, or absent entirely, the battery is likely drained or the unit itself may need replacement. Progressive’s safety guide notes that pressing the test button again will silence the alarm once you’ve confirmed it works.
If you hear nothing after holding the button for 30 seconds, the battery is dead. Replace it within 24 hours—do not wait for the chirping warning. Allstate notes that waiting invites risk during overnight hours when occupants are most vulnerable.
How do I test a smoke detector?
There are three ways to test a smoke detector: using the test button, with a multimeter to check battery voltage, or with actual smoke. The test button method covers most situations. The other two are useful when you suspect the battery might be marginal or when the alarm fails to sound despite holding the button.
Using the test button
- Stand directly beneath the detector or use a stable step stool
- Press and hold the test button firmly for 30 seconds
- Alert family members first—the alarm is loud
- Press the button again to silence if functioning properly
Per Allstate (USFA testing guidance), this works for both battery-powered and hardwired detectors with backup batteries.
Without the test button
If the test button is inaccessible or broken, remove the battery, press and hold the test button to discharge any residual charge, then insert a fresh battery. DIY Tips (home maintenance channel) demonstrates this reset procedure as a troubleshooting step.
With actual smoke
Blow gently toward the detector’s smoke chamber—do not use matches or aerosol testers unless necessary. This method is less precise than the test button and may not trigger all models. According to Progressive (insurance safety resource), the test button method is preferred because it verifies the entire alarm pathway.
Where is test button on smoke alarm?
The test button location varies slightly between battery-powered and hardwired models, but the principle is the same—it’s always on the accessible face of the unit.
Battery-powered models
On standard battery-powered smoke detectors, the test button is typically centered on the front cover. It may be labeled “Test” or marked with a small icon of a hand pressing a button. Open the battery compartment if you need to access the battery after testing.
Hardwired models
Hardwired smoke detectors have the same test button on the front face, but the unit itself screws into an electrical box in the ceiling or wall. These models also have a backup 9V battery inside the unit—usually accessible by twisting off a side panel or pressing a release tab. Per Allstate (home safety guide), you should test both the hardwired connection and the backup battery.
Hardwired detectors can appear to work fine even if the backup battery is dead—the unit draws power from your home’s electrical system. Testing the battery ensures protection during power outages. Allstate recommends treating the backup battery as your primary safety net during electrical failures.
Do smoke detectors always have a green light on?
Not all smoke detectors have a visible power light, and the color conventions vary by brand. A green light typically indicates normal operation, but its absence doesn’t always mean a problem.
Green light meanings
According to Allstate (home insurance safety guide), a steady green light on a smoke detector generally means the unit is receiving power. On hardwired models, green indicates proper connection to your home’s electrical system. On battery-powered models with a light, green confirms the battery is supplying adequate power.
No green light causes
If your detector has no green light, check the following before assuming failure:
- Battery-powered: Is the battery properly seated? Is it fresh?
- Hardwired: Is the circuit breaker on? Is the unit properly connected to the junction box?
- Some models use blinking red or amber instead of green—consult your manual
Per Progressive (safety guide), if the test button fails after confirming the battery is good, the unit itself may need replacement—especially if it’s a sealed lithium model past its 10-year lifespan.
How to replace smoke detector battery?
Replacing the battery takes under two minutes if you have a fresh 9V on hand. Fire safety organizations recommend replacing batteries every 6 months regardless of test results, ideally during daylight saving time clock changes.
Battery-powered replacement
- Twist off the battery compartment cover or press the release tab
- Remove the old 9V battery, noting the positive and negative terminal orientation
- Insert a fresh 9V alkaline battery, aligning terminals correctly (positive side up or toward the smaller terminal)
- Close the compartment and press the test button for 30 seconds to confirm
Per Prepared Hero (fire safety guide), high-quality alkaline 9V batteries are more reliable than cheaper alternatives in smoke detectors.
Hardwired battery change
- Turn off power at the circuit breaker for that detector
- Twist the detector counterclockwise to release it from the mounting bracket
- Disconnect the wiring harness and set the unit aside
- Replace the backup battery in the side compartment
- Reconnect the harness, twist the unit back into place, restore power
- Press the test button to verify function
If chirping persists after replacing the battery, hold the test button for 30 seconds to reset the alarm circuit. Prepared Hero notes that residual charge in the old battery compartment can cause phantom chirps.
Testing battery voltage with a multimeter
For a more precise check—especially if your detector is chirping intermittently—a multimeter tells you exactly where the battery stands. This is particularly useful when the test button sounds but the alarm seems weak.
Step-by-step voltage check
- Set your multimeter to 20 DCV range
- Touch the black probe to the negative terminal (larger side) and red probe to the positive terminal (smaller side)
- A new 9V battery should read 9.5–9.7 volts
- A reading below 7.4 volts indicates replacement is needed
Per Chris Basit (home maintenance instructor), if the reading is more than 20% lower than the battery’s rated voltage, replace it immediately. Smoke Alarm Test (technical guide) notes that readings of 8.92V indicate a drained battery, even though it may still produce some sound.
Clean the multimeter probes and battery terminals before testing. Metal-on-metal contact is essential for accurate readings—dust or corrosion can throw off results by 0.5V or more. Chris Basit emphasizes this prep step for reliable multimeter readings.
What we know vs. what remains unclear
Confirmed facts
- The test button method is the standard verification approach
- Hold the test button for 30 seconds to confirm function
- Green light indicates normal power supply on most models
- Replace 9V batteries every 6 months per NFPA guidance
- Sealed lithium batteries can last up to 10 years
- Dust buildup can cause false chirps after battery replacement
What remains uncertain
- Exact 9V lifespan varies by model, brand quality, and environmental conditions
- Green light behavior differs across manufacturers—some use red or amber
- Regional variations in recommended battery types are not fully documented
- Official voltage thresholds from specific smoke detector manufacturers not publicly available
Expert perspectives
“A good battery should test around 9 volts—if the reading is more than 20% lower than the battery rating, replace it. Anything lower than 7.4 volts is dying.”
— Chris Basit, Home Maintenance Instructor (YouTube)
“Many safety experts, including the National Fire Protection Association (NFPA), suggest changing smoke detector batteries every six months—ideally during daylight saving time clock changes.”
— Prepared Hero (Fire Safety Guide, preparedhero.com)
“Lithium battery smoke detectors are preferred over detectors with replaceable batteries because they eliminate the twice-yearly battery maintenance cycle entirely.”
— Progressive (Insurance Safety Resource, progressive.com)
Related reading: Smoke Detector Battery Guide · How to Test Smoke Detectors
While the test button primarily checks battery life, step-by-step smoke detector testing guide outlines comprehensive verification steps to catch silent malfunctions early and bolster home safety.
Frequently asked questions
How long should a 9V battery last in a smoke detector?
The average 9V battery lasts 6–12 months in a smoke detector. The NFPA recommends replacing it every 6 months as a preventive measure. High-quality alkaline batteries tend to last longer than cheaper alternatives.
Can ammonia set off a smoke detector?
Yes, ammonia fumes can trigger false alarms in some smoke detectors, particularly photoelectric models. Cleaning products, fertilizers, and certain industrial environments are common sources of ammonia that may cause unwanted activations.
What can falsely set off a smoke detector?
Common false alarm triggers include dust accumulation in the sensing chamber, steam from bathrooms, cooking smoke, aerosol sprays, and strong odors like ammonia. Regular cleaning and proper placement away from kitchens and bathrooms reduces false alarms.
How to tell if a smoke detector is bad?
If the test button produces no sound or a very weak sound after you’ve confirmed a fresh battery, the unit itself may be faulty. Also replace the detector if it’s over 10 years old—older units become less sensitive over time regardless of battery condition.
How to change battery in smoke detector hardwired?
Turn off the circuit breaker, twist the detector to release it from the mounting bracket, disconnect the wiring harness, replace the backup battery in the side compartment, reconnect the harness, and restore power. Test by pressing the button for 30 seconds.
What color should my smoke detector light be?
On most models, a steady green light indicates normal operation and power supply. Red or amber lights may indicate different states depending on the manufacturer—consult your model’s manual. Some detectors have no visible power light at all.
Why is there no green light on my smoke detector?
Your model may not have a power indicator light, or it may use a different color (red, amber) to show status. Check the battery, check the circuit breaker for hardwired units, and consult your owner’s manual to confirm the indicator light scheme.
More related posts
 Sentosa Things to Do: Attractions, Free Activities & Guide
 Can WhatsApp Schedule Messages? Android & iPhone Guide
 How to Scan Documents to PDF: Free Phone & Printer Guide
 South Africa Race Card Today: Tips, Results & Live
 Asian Civilisations Museum Photos: Gallery, Guide & Tips
 Arsenal F.C. vs West Ham Stats: H2H Record & Predictions
 Petir108 Login: Telegram OTP Guide for Gacor Slots
 CDC Voucher July 2025 – Dates, Amount, Eligibility Guide